
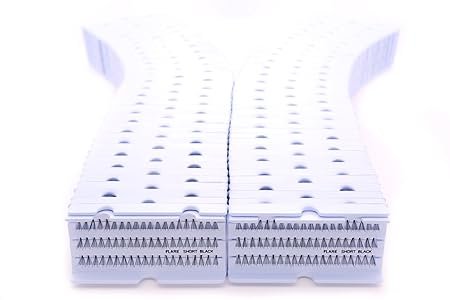
Effortless Elegance: 100 Packs of Flare Short Black Individual Lashes
Individual lashes have revolutionized the beauty industry, allowing for a customized and natural-looking lash enhancement. Among the various options available, flare short black individual lashes stand out for their ease of application and ability to deliver a subtle yet impactful boost to your eyes. A 100-pack ensures you have an ample supply for regular use, special occasions, or professional application.
This comprehensive guide will delve into the world of flare short black individual lashes, exploring their benefits, application techniques, maintenance tips, and how to choose the best ones for your needs. Whether you’re a seasoned lash enthusiast or a complete beginner, this post will provide you with the knowledge and confidence to achieve effortless elegance with these versatile lashes.
Why Choose Flare Short Black Individual Lashes?
Flare short black individual lashes offer a unique combination of benefits that make them a popular choice for many. Let’s explore some of the key advantages:
- Natural Look: The short length and flared design mimic the natural shape of your lashes, creating a seamless and believable enhancement.
- Customization: You have complete control over the volume and placement of the lashes, allowing you to create a look that perfectly complements your eye shape and desired style.
- Easy Application: Compared to strip lashes, individual lashes are easier to apply, especially for beginners. They offer more flexibility and precision.
- Comfort: Individual lashes are lightweight and comfortable to wear, as they don’t weigh down your entire lash line.
- Cost-Effective: A 100-pack provides excellent value for money, especially if you wear lashes frequently.
Beyond these core benefits, flare short black individual lashes are also incredibly versatile. You can use them to fill in sparse areas, add subtle volume, or create a more dramatic, winged effect. The possibilities are endless!
Understanding Different Types of Individual Lashes
Before diving into application techniques, it’s important to understand the different types of individual lashes available. This knowledge will help you make informed choices and select the best lashes for your specific needs.
- Flare vs. Single Lashes: Flare lashes, also known as cluster lashes, consist of several individual lashes bonded together at the base. Single lashes, on the other hand, are individual strands that are applied one by one. Flare lashes are generally easier and faster to apply, making them a popular choice for beginners.
- Length: Individual lashes come in various lengths, typically ranging from 6mm to 14mm. Short lashes (8mm-10mm) are ideal for a natural look, while longer lashes (12mm-14mm) create a more dramatic effect.
- Material: Most individual lashes are made from synthetic materials like faux mink or silk. These materials are lightweight, durable, and cruelty-free.
- Curl: Lashes also come in different curl types, such as J curl, B curl, and C curl. The curl type affects the overall shape and lift of the lashes.
- Color: While black is the most common color, individual lashes are also available in brown and other shades. Black lashes provide a bold and defined look, while brown lashes are more subtle and natural.
When choosing individual lashes, consider your desired look, eye shape, and personal preferences. Experiment with different lengths, materials, and curl types to find the perfect combination for you.
Step-by-Step Guide to Applying Flare Short Black Individual Lashes
Applying individual lashes can seem daunting at first, but with practice and the right technique, it becomes a breeze. Follow these step-by-step instructions for flawless application:
- Prepare Your Lashes: Start by curling your natural lashes with an eyelash curler. This will help them blend seamlessly with the individual lashes. Apply a thin coat of mascara to provide a base for the lashes to adhere to.
- Choose Your Lash Glue: Select a high-quality lash glue that is specifically designed for individual lashes. Look for a glue that is waterproof, latex-free, and dries clear.
- Apply the Glue: Squeeze a small amount of lash glue onto a clean surface, such as a piece of foil or the back of your hand. Dip the base of the individual lash into the glue, ensuring that it is evenly coated.
- Position the Lash: Using tweezers or a lash applicator, carefully position the individual lash onto your natural lash line, as close to the base of your lashes as possible. Start from the outer corner of your eye and work your way inwards.
- Secure the Lash: Gently press the individual lash onto your natural lash line for a few seconds to allow the glue to dry and secure the lash in place.
- Repeat: Repeat steps 3-5 until you have achieved your desired look. You can add more lashes to the outer corner for a more dramatic effect, or focus on filling in sparse areas.
- Blend: Once all the lashes are applied, use an eyelash curler to gently clamp your natural lashes and the individual lashes together. This will help them blend seamlessly and create a more natural look.
- Apply Mascara (Optional): If desired, you can apply a thin coat of mascara to further blend your natural lashes and the individual lashes. Be careful not to apply too much mascara, as this can make the lashes look clumpy.
Pro Tip: For a more natural look, apply the individual lashes slightly spaced apart. This will create a more airy and feathery effect.
Maintaining Your Individual Lashes for Long-Lasting Elegance
Proper maintenance is crucial for extending the lifespan of your individual lashes and keeping them looking their best. Follow these tips to ensure your lashes stay in top condition:
- Avoid Oil-Based Products: Oil-based cleansers and makeup removers can dissolve the lash glue, causing the individual lashes to fall out. Use oil-free products instead.
- Be Gentle: When cleansing your face, avoid rubbing your eyes too vigorously. Gently pat the area around your lashes to avoid dislodging them.
- Avoid Sleeping on Your Face: Sleeping on your face can crush and damage the individual lashes. Try to sleep on your back or side to protect them.
- Remove Makeup Carefully: Use a cotton swab dipped in oil-free makeup remover to gently remove any makeup from your lashes. Avoid pulling or tugging on the lashes.
- Brush Your Lashes: Use a clean mascara wand or lash brush to gently brush your lashes daily. This will help keep them separated and prevent them from clumping together.
- Store Your Lashes Properly: When you’re not wearing your individual lashes, store them in a clean, dry container to protect them from dust and damage.
With proper care and maintenance, your individual lashes can last for several weeks, allowing you to enjoy effortless elegance for longer.
Choosing the Right Lash Glue: A Critical Component
The lash glue you choose plays a significant role in the longevity and comfort of your individual lashes. Selecting the right glue is crucial for a secure and worry-free application.
- Ingredients: Always opt for a latex-free glue, especially if you have sensitive skin or allergies. Latex allergies are quite common and can cause irritation and discomfort.
- Color: Lash glues come in clear, black, and dark-tone options. Clear glues are more forgiving for beginners, as any excess glue won’t be visible. Black glues, on the other hand, can add definition to the lash line, creating a more dramatic look.
- Drying Time: Some glues dry quickly, while others take longer. Faster-drying glues require more precision, while slower-drying glues allow for more adjustments.
- Waterproof vs. Water-Resistant: If you plan on wearing your lashes in humid conditions or during activities that may cause you to sweat, choose a waterproof glue. Water-resistant glues are suitable for everyday wear.
- Strength: Consider the strength of the glue based on how long you intend to wear the lashes. For short-term wear, a lighter-hold glue may suffice, while for longer wear, a stronger-hold glue is recommended.
It’s always a good idea to test a small amount of lash glue on your skin before applying it to your lash line to check for any allergic reactions. Look for glues that have good reviews and are recommended by professionals.
Troubleshooting Common Individual Lash Application Issues
Even with the best techniques, you may encounter some challenges when applying individual lashes. Here’s how to troubleshoot some common issues:
- Lashes Falling Off: This could be due to insufficient glue, oily eyelids, or using oil-based products. Ensure you’re using a good quality, oil-free lash glue and prepping your eyelids properly.
- Irritation or Allergic Reaction: Discontinue use immediately and consult a doctor. Ensure you’re using latex-free glue and that you’re not allergic to any of the ingredients.
- Uneven Application: Practice makes perfect! Use a magnifying mirror for better visibility and take your time. Ensure each lash is placed at the same angle and spacing.
- Lashes Looking Too Clumpy: Avoid using too much glue and brush your lashes regularly to prevent them from clumping together. You can also use a lash separator tool to separate individual lashes.
- Difficulty Removing Lashes: Use a dedicated lash remover or oil-free makeup remover to gently dissolve the glue. Avoid pulling or tugging on the lashes, as this can damage your natural lashes.
Don’t get discouraged if you don’t get it right the first time. With practice and patience, you’ll master the art of applying individual lashes.
Flare Short Black Individual Lashes: Comparing Brands and Options
With so many brands and options available, it can be challenging to choose the right flare short black individual lashes. Here’s a comparison table to help you make an informed decision:
| Brand | Material | Length | Price (100-pack) | Pros | Cons |
|---|---|---|---|---|---|
| Ardell | Synthetic | 8mm, 10mm | $10-15 | Affordable, widely available, natural look | May not be as durable as higher-end brands |
| Kiss | Synthetic | 8mm, 10mm, 12mm | $12-18 | Easy to apply, good value, variety of lengths | Can be a bit stiff |
| Lashify | Faux Mink | 8mm, 10mm, 12mm | $20-30 | High-quality material, lightweight, natural look | More expensive than other brands |
| Eylure | Synthetic | 10mm | $15-20 | Natural looking , Easy application | Limited Length options |
| Quewel | Faux Mink | 8mm,10mm,12mm,14mm | $13-22 | Variety of length options, made with soft fibers. | Not easily accessible. |
This table provides a general overview of some popular brands. Be sure to read reviews and compare prices before making a purchase. Ultimately, the best individual lashes for you will depend on your individual preferences and needs.
The Art of Achieving Different Looks with Individual Lashes
One of the great advantages of individual lashes is their versatility. You can create a wide range of looks, from subtle and natural to bold and dramatic, simply by varying the placement and number of lashes you apply.
- Natural Look: Apply a few individual lashes to the outer corners of your eyes to add subtle definition and length. Focus on filling in sparse areas rather than creating a dramatic effect.
- Cat-Eye Look: Apply more lashes to the outer corners of your eyes, gradually increasing the length as you move outwards. This will create a winged effect that elongates your eyes.
- Doll-Eye Look: Apply the longest lashes to the center of your eyes to create a wide-eyed, youthful look. Avoid applying too many lashes to the outer corners, as this can make your eyes look droopy.
- Smoky Eye Look: Apply a combination of short and medium-length lashes to create a dense, voluminous lash line. This will complement a smoky eye makeup look perfectly.
- Everyday Glam Look: A balanced application of medium length individual lashes across your lash line is the best choice for every day look.
Experiment with different placements and lash lengths to discover your favorite looks. Don’t be afraid to get creative and customize your lash application to suit your individual style.
Individual Lashes vs. Strip Lashes: Which is Right for You?
Individual lashes and strip lashes are both popular options for enhancing your lashes, but they offer different benefits and drawbacks. Here’s a comparison table to help you decide which one is right for you:
| Feature | Individual Lashes | Strip Lashes |
|---|---|---|
| Application | More time-consuming, requires precision | Faster and easier |
| Customization | Highly customizable, allows for targeted placement | Limited customization, fixed shape |
| Natural Look | Can create a very natural look | Can look more dramatic and less natural |
| Comfort | Lightweight and comfortable | Can feel heavy and uncomfortable |
| Longevity | Can last for several weeks with proper care | Removed daily |
| Cost | More cost-effective in the long run | Can be more expensive if worn daily |
Ultimately, the best choice for you depends on your individual needs and preferences. If you’re looking for a natural, customizable, and long-lasting solution, individual lashes are an excellent choice. If you’re looking for a quick and easy way to add drama to your lashes, strip lashes may be a better option.
Conclusion: Embrace Effortless Elegance
Flare short black individual lashes offer a versatile and cost-effective way to achieve effortless elegance. With their natural look, customizable application, and long-lasting results, they’re a must-have for any beauty enthusiast.
By following the tips and techniques outlined in this guide, you can confidently apply and maintain your individual lashes for a flawless and captivating look. Embrace the art of lash enhancement and unlock your true beauty potential. Invest in a 100-pack of flare short black individual lashes and experience the transformative power of perfectly enhanced eyes.